Building a Backyard Railroad -- page 17
August 31, 2004
Would you believe it? Almost a year has come and gone. Much has changed.
The price of commercial pressure treated lumber for example has more than
doubled. That's because lumber suppliers have voluntarily stopped using
CCA (that's Copper Chromium Arsenic) and now only sell ACQ (alias Alkaline
Copper Quaternary).
The new warnings are just as bad, and maybe worse than the old. Plus, the
new lumber is somewhat more reactive than the old. The supplier indicates
the need to stop using the old fasteners and start using enameled ones.
We are told to NOT put aluminum in contact with the new wood. The only
reaction I have observed so far is, the rail forms a white oxide where
it contacts the ACQ lumber. The only precaution I am taking, is to paint
the bottomside of the rail.
So how do you build a switch?
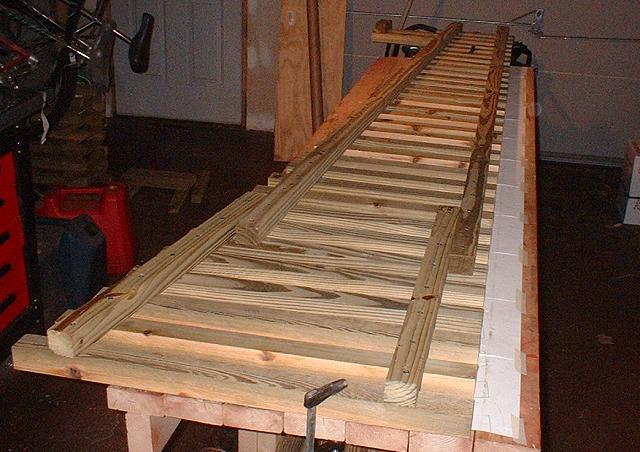 Once again, use the track panel building bench and template. Do you need
a special template? No. Use the straight track template. The ties do need
to be cut to the correct lengths, though.
Once again, use the track panel building bench and template. Do you need
a special template? No. Use the straight track template. The ties do need
to be cut to the correct lengths, though.
 Two of the ties need to be extra long to support the switch stand. Don't
under estimate how long these need to be for the stand to be clear of trains.
Two of the ties need to be extra long to support the switch stand. Don't
under estimate how long these need to be for the stand to be clear of trains.
 This is the first real switch on the line. It is on the north leg of the
Carl Baskin cutoff, a switchback that will allow trains to reverse direction.
It will join the main loop at the southwest corner, and also is access to
the yard tracks.
This is the first real switch on the line. It is on the north leg of the
Carl Baskin cutoff, a switchback that will allow trains to reverse direction.
It will join the main loop at the southwest corner, and also is access to
the yard tracks.
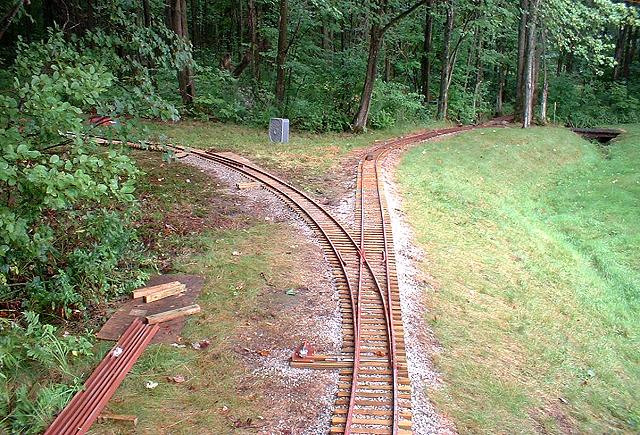 The cutoff heads into a clearing in the woods, where the yard tracks and
car barn will be.
The cutoff heads into a clearing in the woods, where the yard tracks and
car barn will be.
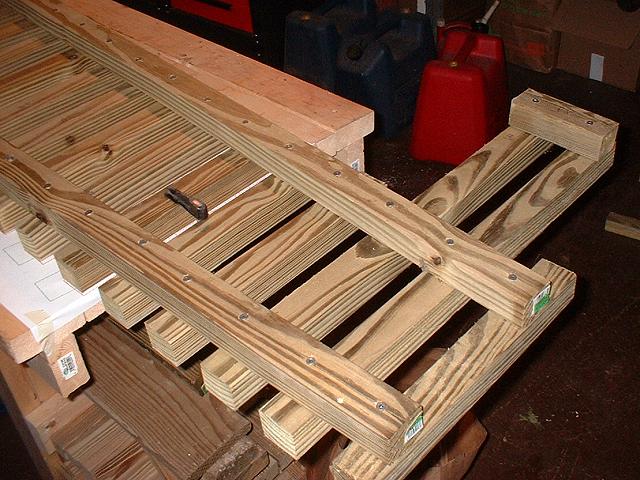
 I was thinking about using a stub switch here, but then I thought that would
be rather pointless. This little switch machine controls the position of
the points. The handle clearly indicates the route the switch is set to.
I was thinking about using a stub switch here, but then I thought that would
be rather pointless. This little switch machine controls the position of
the points. The handle clearly indicates the route the switch is set to.
 Point Recipe (#6)

 a. Cut a piece of stock rail to length 32"
 b. Outside, using straight end mill, from point end, remove head and
    foot up against web, withdrawing tool linearly .29/32" but stopping
    3" from the frog end.
 c. Inside, from point end, using 15 degree end mill, remove head only
    starting .05" from top outside web edge, maintaining distance for 8",
    then withdrawing at a rate of .419/24".
 d. Some bending may be required to fit application.
|
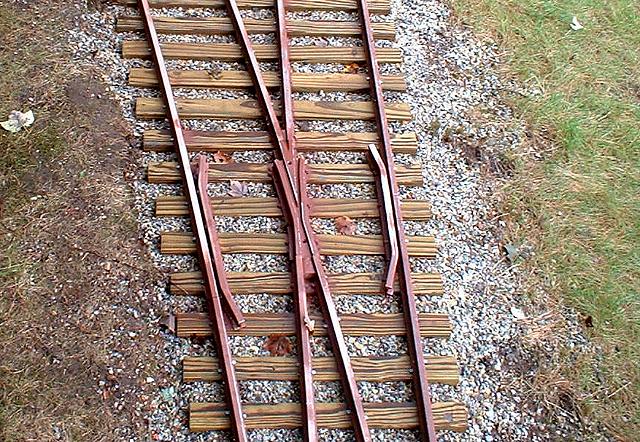 And here is my frog and guard rails. The frog is a #6 from Cannonball. A
5.5 would be ideal, but 6 is close enough. The guard rails are made from
leftover pieces of stock rail.
And here is my frog and guard rails. The frog is a #6 from Cannonball. A
5.5 would be ideal, but 6 is close enough. The guard rails are made from
leftover pieces of stock rail.
 Guardrail Recipe

 a. Cut a piece of stock rail at least 12" long.
 b. Mark 2" from each end for cuts and bends.
 c. Inside edge: Cut a 30 degree "V" in foot at each mark, up to
    the web. Do not cut the rail head.
 d. Outside edge: Cut a simple slit in the foot at each mark, up to
    the web. Do not cut the rail head.
 e. Bend each end inward at the cuts/marks. The "V" cuts make room for
    the bends to take place. I usually use a 30 degree bend.
 f. Remove (mill off) linearly, most of the foot on the outside edge
    so that guard can be placed correct distance from stock rails.
    I use 1/4" head-to-head, but that might be too tight for some.
 g. With gaurd in place, mark location for screw holes. Drill holes in
    foot about 1/2 the width of the foot from the edge. I can usually
    get 5 screws in a guardrail.
|
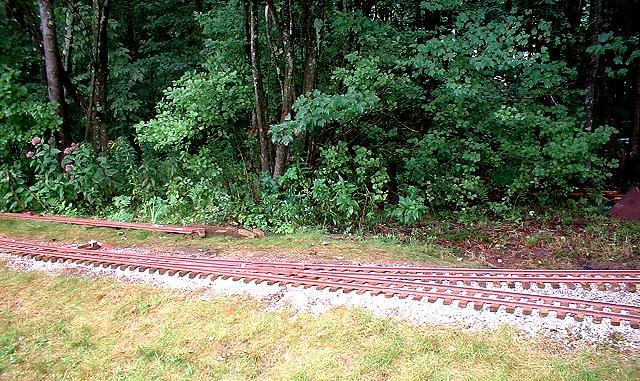
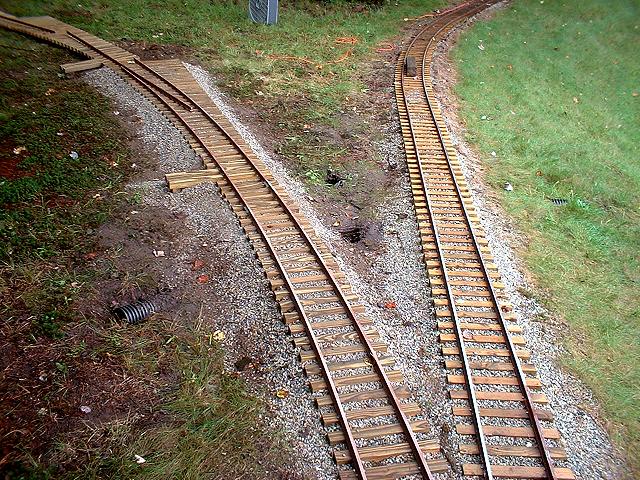 Look closely. See the two drain pipes under the two diverging routes? Those
pipes keep this area from becoming a lake. Also notice two more switches
under construction. The first one is the yard entrance off the cutoff.
Look closely. See the two drain pipes under the two diverging routes? Those
pipes keep this area from becoming a lake. Also notice two more switches
under construction. The first one is the yard entrance off the cutoff.
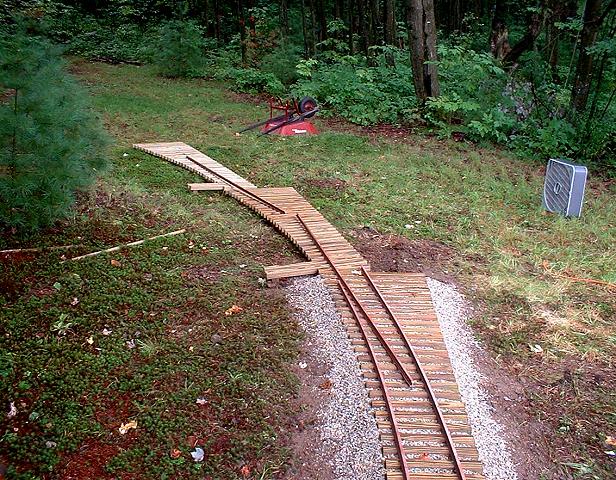 And another switch. The last two switches will connect to three yard tracks
which will head into the car barn. Where am I getting the soil for the
subgrade? From the bottom of one of the rivers.
And another switch. The last two switches will connect to three yard tracks
which will head into the car barn. Where am I getting the soil for the
subgrade? From the bottom of one of the rivers.
Onward to Next Page
Back to Previous Page
Back to Main Rail Page