Building an Electric Switching Locomotive-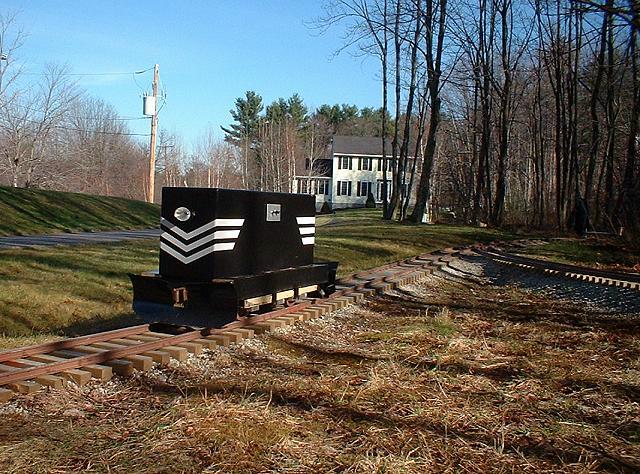
"Waiting for a crew" For some reason, many people worldwide will aquire some sort of affection for trains. Nobody really knows why. It just happens. Those who don't have access to the real thing will aquire scale models of one gauge or another. Some of us don't have the mentality to stick to just one gauge. But choice of which gauge to acquire seems to be related to the funds available. And over time, that changes. I became interested in Live Steam over 40 years ago. But because of limited resources I was limited to HO scale. It was fun. But you don't get involved in any of the physics of moving tonnage. You also don't get to ride along. So, at the end of 2002, I bought a Mikado "kit". It was actually a box of rough castings and some drawings. My assumption about the hobby at the time was that everyone had to build their own locomotive. Wasn't that one of the rules? It wasn't until after I started building mine that I discovered almost nobody does that anymore. During the construction of my 2-8-2 it became obvious that a track would be needed to run tests and make adjustments. But there were no tracks within a reasonable distance. So work began on a small backyard test track. Time was diverted from building the Mikado to building track. Parts were ordered to build a boxcar that could be used as a riding car. What happened next was not predicted. A friend in Michigan was out of work from one of the auto makers and was building freight cars to pass the time and make ends meet. He built 2 hopper cars, 4 flat cars, and a caboose for the new railroad, which was then a complete loop that would be used year-round. Add to that the original boxcar and a new gondola, what we had was a complete railroad minus one thing -- a locomotive. It would be at least another 2 years before the Mikado would be ready to set on the tracks. What was needed was a small switcher. Just something to pull cars. I don't care if someone else builds my freight cars. But rule #1 is still in force for locomotives -- You must build it yourself. Here is a list of goals... 1. cheap 2. quick to build 3. uses common hardware store items 4. must be powerfulIt must be cheap. That's obvious. The Mikado will be consuming most of my spare cash. And I need it now. I cannot afford to take even more time away from the steamer. Powerful. It must be able to haul logs, ballast, cars, and people. 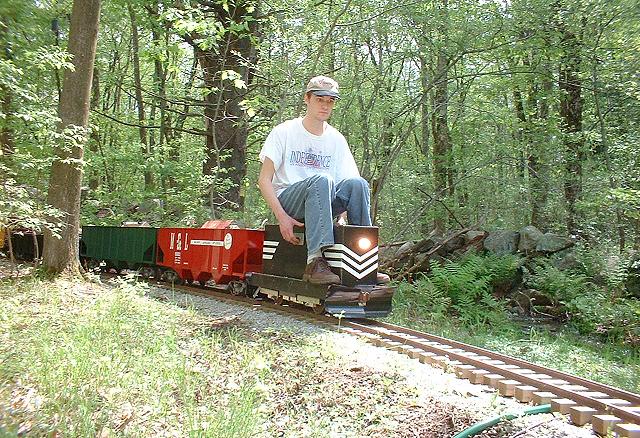
Here's Ken with a local freight It will be made primarily from common angle iron, also known as "bed rail" available from hardware and mattress stores as well as industrial metal suppliers. Bearings, shafts, and sprockets will be commercially available. Wheels and couplers will come from Tom Bee (where else?). Motor - from a surplus house. The body shell - 1/2" plywood of course. So much for the easy part. I started out with an unsprung and unequalized chassis. On a good day it might stay on the tracks. But in the winter when the frost heaves set in there was no hope. A modification was made to add springs, but that was not the answer. Then one truck was allowed to swing. This kept all 4 wheels on the rails. But it would try to buck you off like an old mule if you sat in the wrong place. Remember that the engineer must ride the locomotive. This is for traction. More weight equals more traction. Finally, a fully equalized 2 truck design was used. And there has never been a derailment since. Although springing is relatively unimportant, equalization is mandatory. 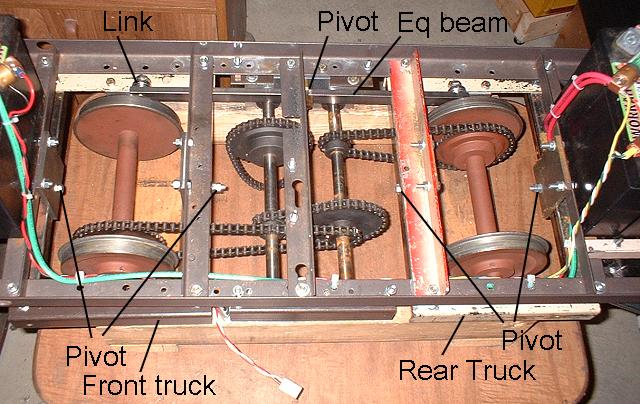
The 2-Truck equalized frame (motor removed) Originally, only one equalizer beam was used, as in this photo. But later one beam on each side was chosen because it eliminates the need for the ball joint links you see in the photo. Notice also, that nearly every frame piece is made from angle iron, most of it salvaged from an earlier project. Never underestimate the importance of the pilot. For pilots I used snowplows which are seasonally available from Precision Steel Car Company. Never operate a locomotive without pilots. If it derails for any reason you will break your nose. The pilots will support the engine if the wheels go off the rails. Cabs are optional. In many of my photos, you will see a "B" unit. That is because although I built cabs, I never got around to installing them. The motor I used is a 2.5 horsepower 120 volt DC treadmill motor. The controller is a DC to DC converter that operates on 24 volts. It produces 0 to 120 volts DC in 3 transitions. Here's the Parts List...
  frame
    2  side rail                 angle iron
    2  drive support rail (L/R)  angle iron
    2  idler bearing rail        angle iron
    2  motor mount rail          angle iron
    4  plow bracket (L/R)        angle iron
    4  plow brace                thinwall tubing
    2  pilots                    Precision Steel Car Co snowplow
    2  couplers                  Tom Bee - rigid

  truck (2 required)
    2  wheel 5.25"               Tom Bee
    1  3/4" axle
    2  3/4" mounted bearing      McMaster 5913K43
    1  35 tooth sprocket
    2  side rail                 angle iron
    2  transom spreader          3/4" square bar
    2  hanger                    1/4" steel plate

  equalizer
    2  equalizer beam            steel barstock
    2  equalizer bracket         angle iron

  battery frame
    2  outside frame             angle iron
    2  inside frame              angle iron
    2  coupler tube              1x2 steel rectangle tube (Tom Bee)

  drive
    2  5/8" shaft
    4  5/8" mounted bearing      McMaster 5913K42
    2  30 tooth sprocket
    4  13 tooth sprocket
    1  motor                     Surplus Center
    1  motor/hs chain
    1  hs/ls chain
    1  ls/front chain
    1  ls/rear chain

  shell
    1  top                       1/2" plywood
    2  ends                      1/2" plywood
    2  sides                     1/2" plywood
    2  footboards                1/2" plywood
    2  side sills                1/2" plywood

  cabs (2 optional)
    1  roof                      1/2" plywood
    2  end                       1/2" plywood
    1  side                      1/2" plywood
And here's a mechanical drawing...
Also, check this link for other drawings which may become available. So, are you thinking about building a little work horse? A "critter" as some call it? Some details, such as batteries and controllers are outside the scope of this article. But there are many combinations that will work. Just make sure your motor is big enough. I recommend at least 1 horsepower. As for gear ratios, I use about 1:20, but that is a little slow. Higher ratios will give you more speed, and lower ratios, more pulling power. If you find you run out of traction before running out of pulling effort, you can go with a higher ratio. Don't be afraid to experiment. It took me 3 tries to get it right.
Safety FirstRemember, you will be working with 1 to 2 horsepower on chain and sprocket drives. There will be around 1 kilowatt of electrical power. Use all appropriate safety measures when working with mechanical and electrical systems. Also observe all safety precautions when using tools during construction.Building locomotives - even cheap and simple ones - can be lots of fun. And anyone who really wants to can do it. Plus, nobody will say you didn't build it yourself. |