90 Ton Mikado, Page 21(Back to Page 20) 12/22/6 -- Smokebox Door Hinges 
Image 117 -- Smokebox Door Hinges These are freelance parts. No there is no drawing for these. You can look at many prototype photos and get a general idea how they look. But the best way to make these is to grab some 1/16" strips of mild steel 1/2" wide and start cutting and grinding and bending until they look right - or at least close. 4/5/7 -- Front Walk, Steps, and Handrail 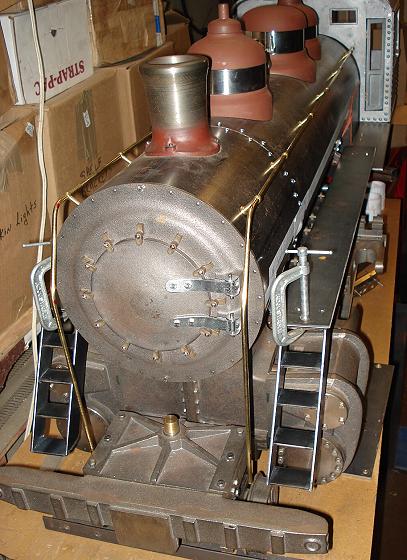
Image 118 -- Front Walk, Steps, and Handrail The front walkway has been installed on each side, minus an extra support that will be needed. All of these parts you make yourself as there are no castings or drawings for these. The front ladders are no exception to this rule. Most these parts have been extracted from the original Baldwin erecting card, circa 1915. The location and size of the ladders and walks came from that drawing. The handrail is naval brass 3/16" rod. The stancions are from LocoParts out of Suffolk, Virginia. Now I can see what I'm missing. There is a front deck walkway on each side between the pilot beam and the front of the cylinders. The bottom of the ladders and the handrail attach to these. I have learned, if I don't have metal sheet stock of the right width, I can make it by welding 2 or more widths of whatever I have together. I will need to do just that for these parts. 4/7/7 -- Reverse Links 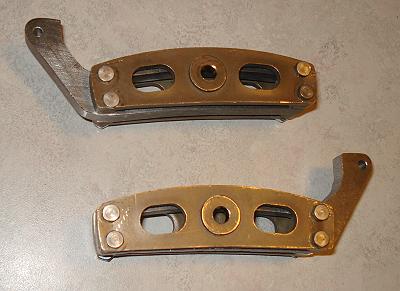
Image 119 -- Reverse Link Assemblies These are a bit challenging to make. The link plates (on the outsides) are silicon bronze castings and are easy to drill. But the link itself (in the center) is made from tool steel. It is hard stuff, even in the annealed state. It must be cut to shape, drilled, and slotted for the die block to run in. The purpose of this assembly is to set the phase of the valve timing relative to the pistons. It is use to control the direction of the power stroke and of the locomotive. By itself, it is not obvious how it works. 4/13/7 -- Reverse Link Pins and Bushings 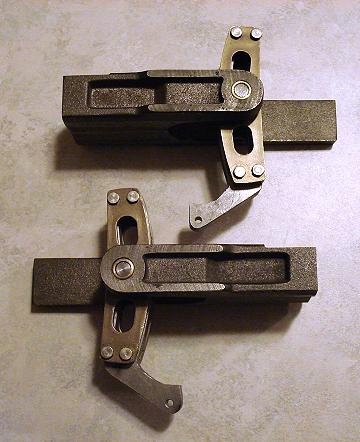
Image 120 -- Reverse Links with Pins, Bushings and Brackets The reverse links pivot on their link pins. These pins are pressed into the link plates, but do not go inside them. The radius rod halfs need to slide between the links and the link plates and not hit the pins. The pins rotate inside bushings made of brass. I could have bought these parts but decided to make them myself. 6/8/7 -- Front Ladders Handrail and Deck Extensions 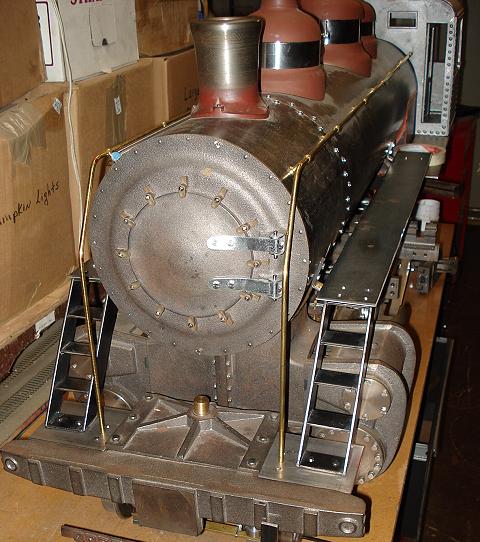
Image 121 -- Addition of Front Deck Extensions OK. Now the missing pieces have been scratch built. These are the front deck extensions - a little walkway at the bottom of the front ladders. There are also brackets behind the pilot beam that you can't see that support these. Halogen Headlight Retrofit 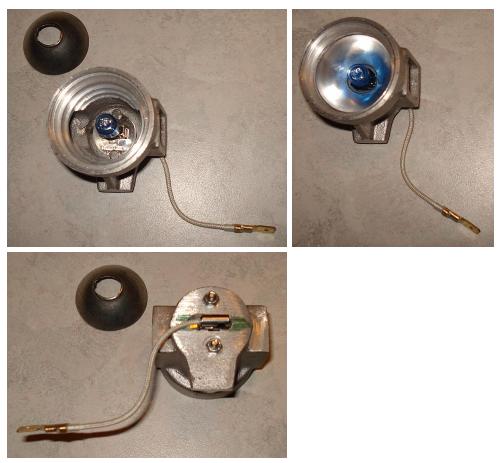
Image 122 -- Halogen Headlight Bulb This is a Cannonball Ltd headlight - a nice little casting that comes with a reflector, a flashlight bulb, and a piece of acrylic intended to be used as a lens. Needless to say, the flashlight bulb is just not bright enough. So out with the cheap bulb and in with a halogen "fog light" bulb along with a little machining and drilling. We will also need to toss the plexiglas lens as it will melt and replace it with a glass lens. The mounting method had to be changed as well. The old bulb was fastened to the reflector with a plastic ferrule. That won't work here. This is 55 watts. And yes, the blue stuff on the bulb will get removed next time I have it out of the casting. This is already high temperature wire. It had to be for the bulb, but it also has to go through the smokebox. (Onward to Page 22) |