90 Ton Mikado, Page 24(Back to Page 23)
1/25/8 Cab and Nose WorkWhen you get tired of working on the chassis, it's time to do more work on the superstructure. One item that's been on the list for a long time - is to mount that headlight to the front of the engine. 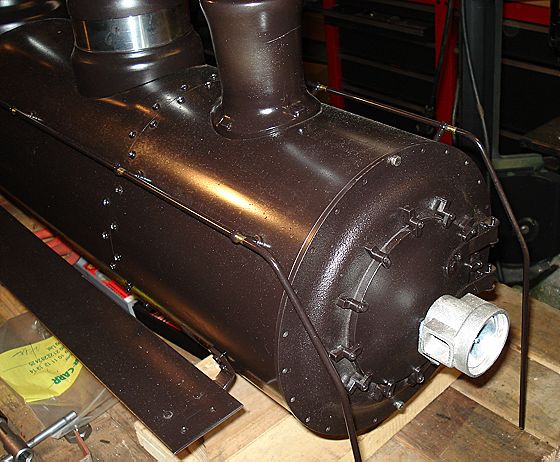
Image 140 -- Headlight mounted to Smokebox Door This is the Cannonball Ltd headlight that was retrofitted with a halogen lamp a couple pages back. I had to make a bracket to hold it to the smokebox door. The wire for the bulb feeds through the mounting bolt. 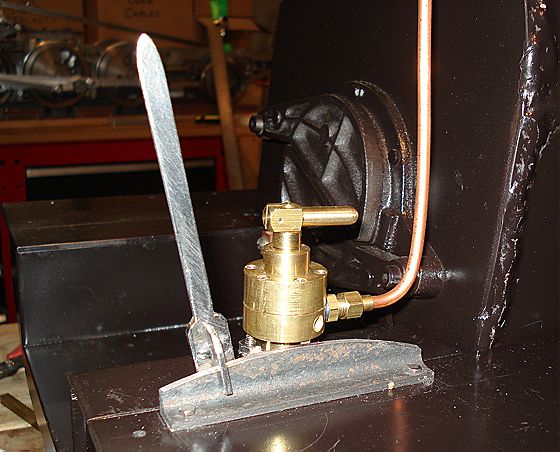
Image 141 -- Reverse Lever and Brake Stand Time to install the Johnson Bar. This lever is used to control the valve timing and to change the thrust direction of the locomotive. You can call it the Reverse Lever. Also installed is the detent bar although there are no detents at this time. That will come when it is known where they need to go. 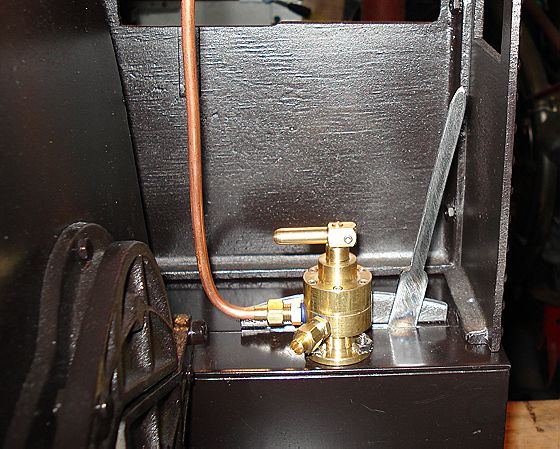
Image 142 -- Cabside view of Johnson Bar and Brake Valve Also Mounted is the Brake Valve. This is a Locoparts gem. And that's about where it would be on a real logging Mikado. The cab is starting to get a nice "homey" appearance. I like that.
1/26/8 Oil Pump CamHere's a part that is not on the drawings and definately not on the list of things to make. I'm not sure why I chose today to make this part. 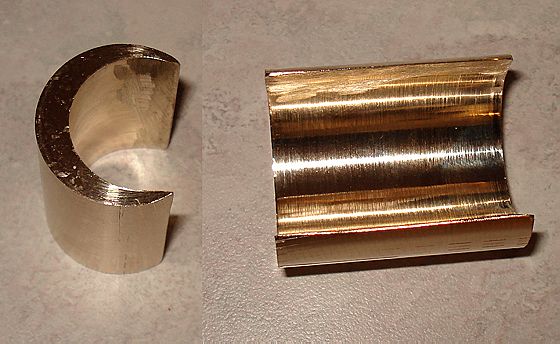
Image 143 -- Oil Pump Cam This cam clamps onto the #3 axle directly using a pair of shaft collars. It is not necessary to remove the axle from the chassis for installation. This cam operates a rod that drives a lever that drives a piston pump to force oil into the steam line behind the throttle valve. 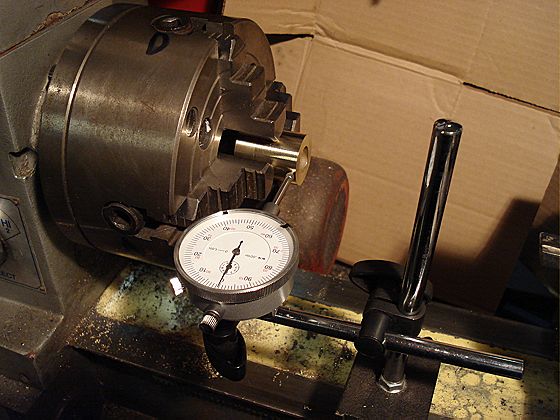
Image 144 -- Setting up Cam Offset The cam is made by starting with a piece of alloy 954 aluminum bronze - an excellent bearing material. It is turned on the outside to the diameter of the rod bearing race. It is then precisely offset in the lathe as shown here. 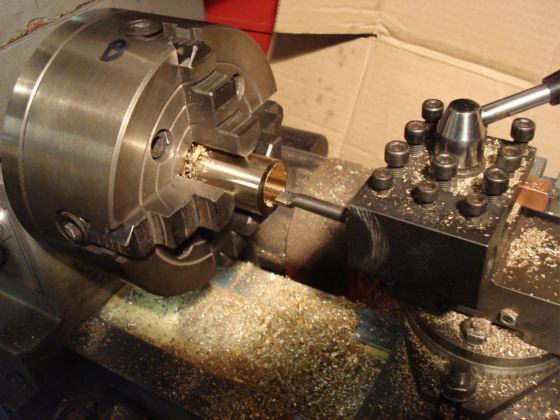
Image 145 -- Turning the inside bore Next the inside diameter is turned with the offset in place. It's a boring job, but someone has to do it. It took me all day to make this part. I bought this material when it was relatively inexpensive. Now it's unbelievably expensive. I'm glad I bought it when I did. 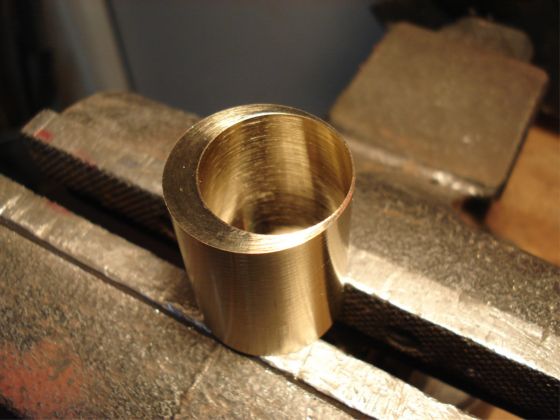
Image 146 -- Before cutting away for axle installation All I need to do now is cut off the web and snap it onto the axle.
1/27/8 Coupler Pocket and CouplerHere's and item that is on the list. Still no drawings for these though. I bought this coupler when bronze was relatively cheap. Now it might as well be gold. The coupler pocket was actually from the USRA heavy Mikado kit. 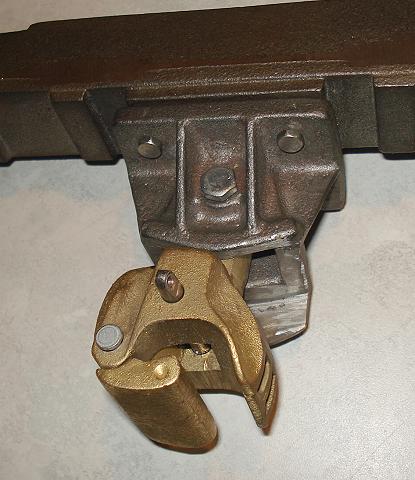
Image 147 -- Coupler and Pocket mounted to Pilot Beam This is a Cannonball bronze coupler. Quite a bit of sawing had to be done to get the shank to fit the coupler pocket. Then the pocket had to be drilled and the coupler plate on the pilot beam had to be drilled and tapped.
(On to Page 25) |