Building a Backyard Railroad


Quick Jump to Page
0 1 2 3 4 5 6 7 8 9 10 11 12 13 14 15 16 17 18 19 20 21 22 23 24 25 26 27 28 29

Visit the Island Pond Railroad Home Page.

If you are thinking about building your own track, consider this ... Don't. It is easy to under estimate the investment in materials and labor required to build and maintain even a small track. If you can - find and join a local club. Pay your dues, help with the maintenance and upgrades, and use their track. You can then put most of your hobby allotted cash into your trains. And you will have the chance to make friends with others who have similar interests.

If, on the other hand, you live too far from the nearest track or they run on a schedule that doesn't work for you, and you insist on running large scale trains, you may have no other option. If you want to lay your own track, please do the math first and do all of it. You sometimes see ads from guys who bought rail, found out how big the job really was, and are now selling the rail. This is the story of building my railroad. New Hampshire, where I live, has a few private tracks, but no clubs. The nearest club is in Holliston, Massachusetts, a 2.5 hour drive. They only run on Sunday, making them useless to us. Joining that club was not an option.

Here is a summary of the materials that were required for may railroad.

        Total line      525'
        Rail           1050'
        Joiners         105
        Ties           1800
        Spike Nails    7200
        Ballast       20,000 lb (10 tons)
Also, I decided to build the entire line on stringers. So I needed to add these to the list, as well as panel joiners (short stringers between panels) which are the same size as my ties. I used 2" drywall screws to fasten the ties to the stringers and join the panels together.

To hold the rail to the ties I use galvanized or zinc plated nails, usually 1.5" x 3d or similar. Many hobbyists think screws are better because they won't pull out. The nails won't either. In fact, try replacing a tie or rail. It is difficult to get the nails out. I use screws around switch gaurdrails and points where I've milled away a major part of the rail foot. They are great for that.

If you live in an area that is prone to rail theft, consider using spikes or nails, or a combination of left and right hand screws. Any thing that slows the theives down means they will get less of it.

        Stringers               132
        Short stringers         132
        2" drywall screws      4128
The rail cost is easy to figure. It's the cost (shipped) per foot times the number of feet required. And always buy extra.
        rail needed      1050'   
        cost per foot x $1.00   
                        -----
                        $1050


-
The lumber cost is the number of boards required times the price per board. The tie size I'm using allows me to get 14 ties from an 8 foot long "two by four". At the time I purchased lumber for my ties, pressure treated lumber was $2.69 for a "two by four".


ties/joiners, (1800+132)/14 = 138
           stringers, 132/2 =  66
                              ---
            boards needed     204
           cost per board x $2.69
                             ----
           lumber cost    $548.76

Then there are other costs

        rail joiners 130 x.70   $91
        ballast                $150
        drywall screws          $25
        spike nails             $35
                               ----
        total misc             $301

-

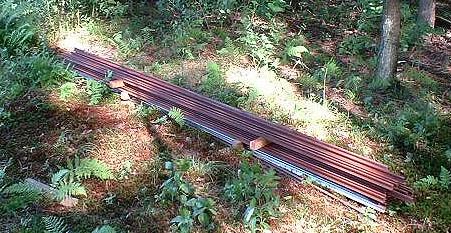
This is "Western" profile aluminum rail in 10 foot lengths.
I chose to paint it with rusty metal primer to look like steel.
-

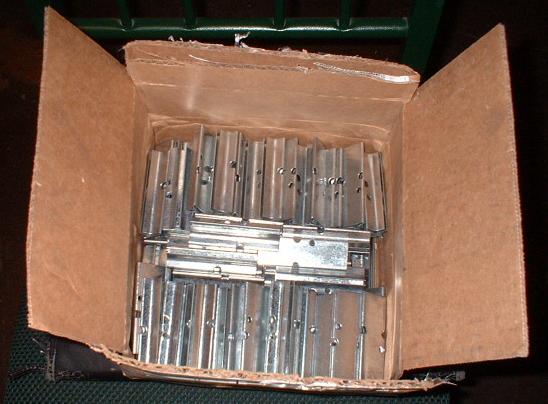
Cannonball Limited sells a nice galvanized folded steel rail joiner. Here's a box of 100.
-

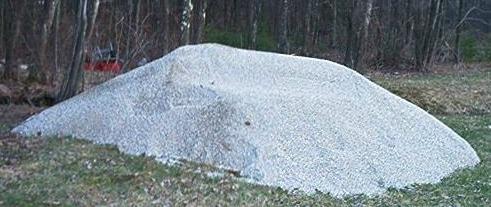
And this is what 20,000 pounds of 3/8" gravel ballast looks like.
Use larger rock. It will drift less in the rain.
And now for the grand total

        Rail                  $1050
        Lumber                 $550
        Misc                   $300
                              -----
        Grand total           $1900

        cost per foot ... $3.62!

And this doesn't include labor which is also monumental.

Making Ties

Material choices are wood, plastic, concrete, and steel. Like most home tracklayers, I chose wood, mostly for economic reasons. This will require a massive, insane amount of lumber.

In some of my photos you may notice some ties are green and some are white. That's because I started out buying stud grade lumber (cheap, but the bugs love it) and switched to pressure-treated deck lumber. I was treating the stud grade ties using a commercial product containing copper napthanate. Problems with this product were cost, lack of coverage, lack of penetration, and it tends to wash off in the rain. So I switched to pressure treated. It also saves the time required to treat the wood.

The size of the ties was determined by a few factors. Boston and Maine's general rule of thumb was 3000 ties per mile. That's a 1.76 foot tie spacing or 2.64 inches in 1/8th scale. I used 3.5 inches, with the width of the tie one-half that dimension. This would take a lot less ties and allow me to uses "two-by-fours" ripped lengthwise in half. I chose a tie length of 13 5/8", giving me 14 ties per 8 foot "two-by-four", or 28 ties per 98 inch long track panel (counting the gap between panels).

There were many reasons for deciding to use stringers. I live in an area the soil can be very soft, and frost heaves are a real problem in the winter. I am not using steel rail, so there is no rigidity benefit added there. Building the line on stringers is similar to building it on a bridge. It is literally suspended off the ground.

Read this article....

Tie Tutorial


Building Track Panels

My track panels are 98 inches long including the gap between adjacent panels. I needed a place to build them that was long enough. So I built this bench out of some of the lumber destined to become ties or stringers. On this workbench is a template, printed on my computer that tells exactly where to place the ties for straight panels, and panels for 38, 40, and 100 foot radius curves. The actual template can be viewed here. Notice the stringers underneath the bench.
-


-
Track panels are built by placing the ties on the desired pattern on the template, placing stringers over the ties, and driving a drywall screw through the stringers into the ties.. On this template, straight track is in black, 40' radius in red, 38' in blue, and 100' in green.
-


-

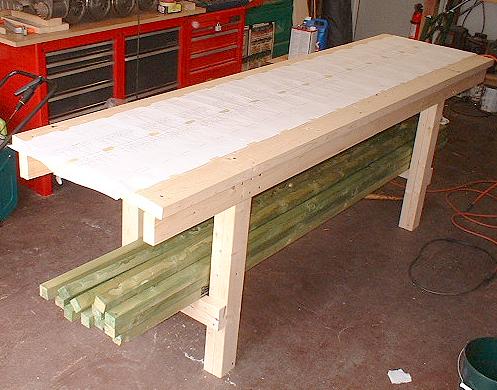
The photo below is a stack of track sections 8 feet long. These have a 40 foot radius. All track sections are built on stringers.
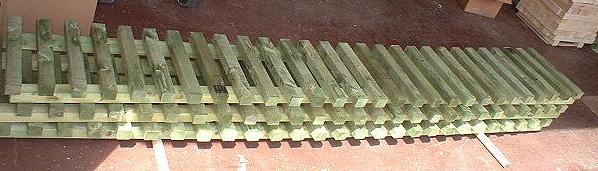
-

-

On to Next Page

Visit the Island Pond Railroad Home Page.